You will need
- - multicolored stripes of cotton fabric, matching each other in color, different widths – from 5 to 8 cm, length 60 cm;
- - cotton fabric for the lining and trim – monochrome or color, suitable in color to the patches – width 80 cm, length 1.2 m;
- - batting the same size as the fabric for the lining;
- - bias binding for trim in the same colors – 4 meters;
- - 10 small bright buttons;
- - graph paper.
Instruction
1
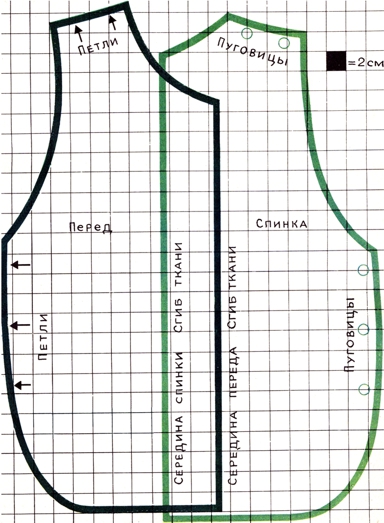
To transfer the pattern from the drawing onto graph paper, or print on the printer to increase. This pattern is designed for 44 Russian size. To reduce or increase the size of the pattern you need to add or subtract a few inches along the crease lines at the bottom of the vest and the shoulders.
2
Strips of fabric spread out in the correct sequence – so that they are beautifully combined with each other, and then astrocyte, leaving a seam 1 cm; the seams should be smooth on both sides. The result should be two square patchwork cloths 60 x 60 cm
Fold these cloths in half lengthwise; place pattern, cut around the chalk along the contour, leaving no seam. To find front and back vests. In the same way to find details of fabric for lining and padding.
Chopping the pins on three paintings front and back, right sides out, protegat them on the car – each line must be performed 2 mm from each seam on the details of patches. Trim off the excess fabric, if any, aligning all edges.
3
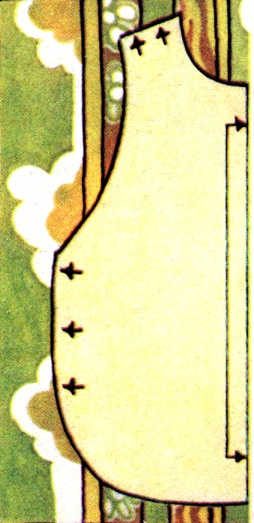
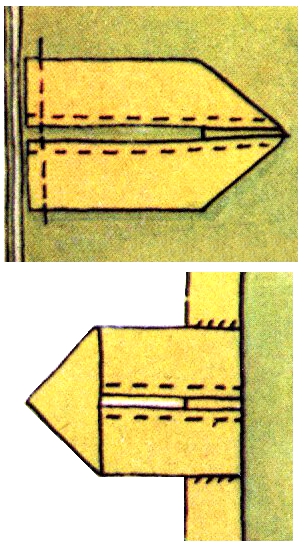
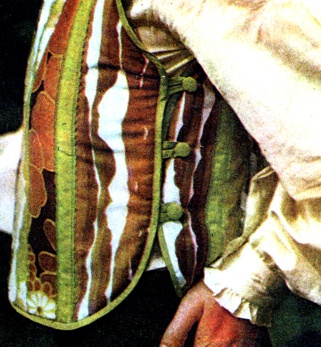
From piping to do 10 loops in the form of arrows as shown in the figure. Tack them from the back to the front of the vest towards the inside, to stitch. Where should be placed the loops and buttons are indicated on the pattern.
4
Bias binding to complete the edging vests – first tack around the perimeter, and then defer on the machine. Bend the loop outwards and pin in the desired position. Sew on buttons; if desired they can be covered used cloth.
Useful advice
Helpful tips: Instead of piping you can use fabric for the lining, raskroyu from the remnants of "bias" wide strips of 4 cm and astrochem of them a long strip. This strip need to pristroit to every detail from the front around the edge, then bend the edging on the wrong side and sew on hand.