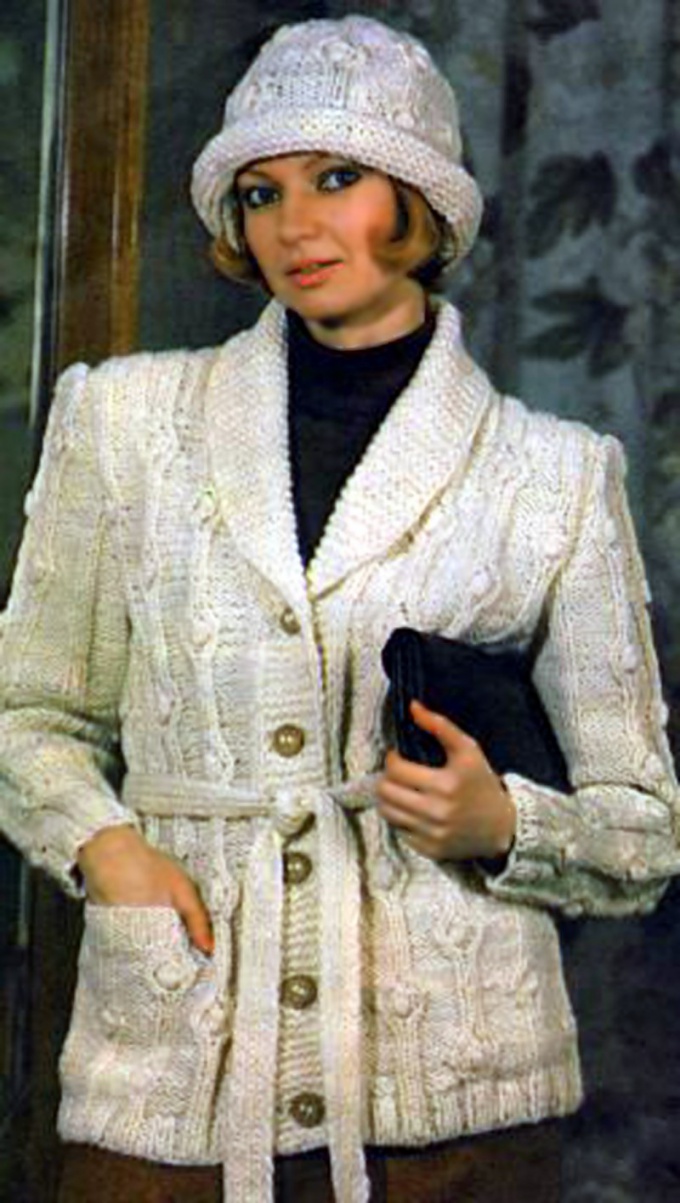
You will need
- - thread crochet;
- - the spokes on the thickness of the threads;
- - circular needles of the same size;
- the pattern of the product.
Instruction
1
Model the pattern. Define the width of the strap. Divide the measure by 2. This value is put into both sides from the middle of the front. If you intend to the product closure in the pattern, only half of the shelves, aside from her half scoop the inside of the part. Extend the bar the same distance in the other direction.
2
Mark the location of the loops or buttons. Place the top two buttons depends on style. This is both the starting point shawl collar. The distance between this point and the bottom of the shelves divide it into equal number of parts. It depends on how many buttons you are going to sew.
3
On the line opposite the strap top opening, put the point 1 and the point of intersection of neckline and shoulder check like 2. Connect them with a straight line. From point 2 put up the same line the size of the sprout. It can be from 5 to 8 cm, depending on the size and width of the collar. Check point 3. Guide to it perpendicular to the side of the neck and mark on it the width of the collar. This will be point 4. Draw a line the collarand connecting the dots 1 and 4 with a smooth curve. This pattern is suitable for any method of making a collar.
4
To tie collar-season at the same time with a shelf, make the calculation of loops, adding to the half shelves half-width of the strap. The bar and collar can be performed in this case garter viscous, facial or purl stitch. It depends on the main figure. If it is mainly the front loops, then finish it is better to take pattern-based reverse loop and Vice versa.
5
Davaite to the first hole. While simultaneously knitting it is better to perform a horizontal loop. Close in the same row several loops, and the next enter the same. Ensure that the loop was strictly the friend over the friend. Dawasa to the top of the loop, start to knit the collar. The classic team can run almost right, you only need to correctly perform a line connecting it with the part. To do this, in each row, take the number of stitches on the main part 1 and at the same increase the number collar.
6
Dawasa to the line of the neck, begin to turn down at the outer edge of the collarand 1 loop in every fourth row. On the inner edge in the same series, add 1 loop, but not at the expense of reducing the number of loops on the main part, and with the help of nakido. In the remaining rows continue to diminish the loop of the main figure and add their number on the strap.
7
Dawasa to the shoulder line, perform the bevel. When the spokes leaving only the loop of the collarand continue to knit, adding loops from the middle of the shelves and subtracting from the shoulder in every fourth row. Davaite to the height of Rostock and close the loop. In the mirror link the second shelf.
8
Back davaite to the upper edge, then go for a pattern that you knit placket and collar on the shelf, and tie in a straight line to the height of the sprout. Stitch detail knitted stitch. In the same way you can associate a collar and separate from the rest of the details.
9
To complete the collarand cross knitting, reduce the number needed for shelves hinges to the half-width of the strap. Knit straight blade to the height of the top button, then from the fasteners start to pull the loop 1 in each row, or 2 in when vyvazhivanii Raglan. Perform bevel shoulder close the remaining loop. The second link the front and the back.
10
Dial on circular needles loops for straps and collarand vymazyvaja them from the edge of the braids. How much will the hinges, depends on the thickness of thread and needles. The main thing — that the placket lies flat, not contracts and not hanging. The number of loops on both sides must be the same. This option trims and collarand can be made of, for example, elastic. Appropriate front and back surface, garter knit. Davaite before the expected mid-strap and make holes for the buttons. In this case, the vertical loop. Close to equal distance from each other the same number of stitches in the next row and knit them dolerite to the end of the plank. Close the loop along the entire length.
11
The team can be modeled. For example, to make the collar a little wider classic. Close the loop in stages, first from the bottom line the shelves to the height of the upper buttons and loops, then a couple of rows — 10-20 loops on each side at the junction of the collarand strap. Provarite 2 more rows and close the remaining loop.
