You will need
- - a knife or screwdriver;
- - hammer;
- vise;
- - multimeter;
- - soldering iron;
- - spare battery cells;
- - automobile light bulb;
- fabric gloves;
- glue.
Instruction
1
Pick up the necessary tools, which will, in the future, disassemble. The minimum set includes a sharp object - this can be a knife, an ordinary kitchen or stationery) or a screwdriver. And also, a hammer to facilitate the process of disassembling the battery, grip for anchoring parsed object stationary and fabric gloves - they help you to avoid getting skin oil on the elements and protect against mechanical damage of the hands understand.
2
Secure the battery latch. The two parts of the battery glued together at the seam, which is located right in the middle of its lateral parts. Insert a sharp object under the angle of 45 degrees. Start by lightly tapping the handle with a hammer or hand. Because the plastic is soft enough, the seam will disperse, but if at some point the glue will hold very tightly, this part should be notched.
3
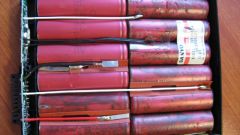
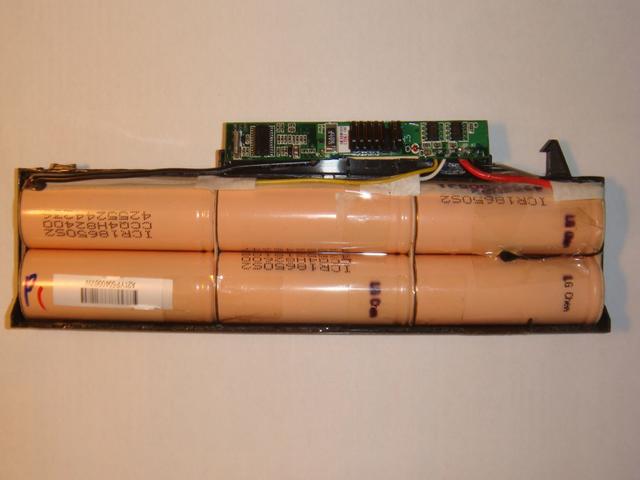
Inspect the battery cells. Usually laptops use them six or eight parts. If there's no sign of mechanical damage to the elements, as well as batteries are not "flowed", you can try to replace the old elements with the new, previously bought from an online store or in the shop radio. For battery replacement, you will also need a multimeter and a soldering iron.
4
Check with a multimeter each element. Each battery should give a value of approximately from 3.7 to 4.1 V. Discharge elements is necessary in order to later all the items were charged uniformly. For this fit automotive light bulb. After the discharge of all battery cells, connect them with the fixtures. The last lock together using a soldering iron. Connect of the battery and glue the seam to prevent moisture from getting inside. Insert the battery in the laptop and make a few full cycles of charge-discharge.