Instruction
1
Install the vehicle on a flat and horizontal floor in the garage. Prepare some tools. First, the screen with the emitter. Attach it on the wall of the garage or on the floor on a stand. In the first case provide adjustment of the laser pointer. Screw on the flexible holder. The screen is fabricated from plywood, height 350 mm, width 400 mm. Make it a layout: a vertical line swipe exactly in the center, the horizontal – departing from below 120 mm At their intersection install a laser pointer. Place for her to make the length of the corresponding hollow tube (for pointers), secure it to the metal plate 100x100 mm, and then on the screen.
2
Fix a screen on a telescopic tripod, i.e. insert the tube, which keeps it in a larger diameter. It will provide the screw to be used as a holder. Distance from the right and left of the screen to the reflectors may be different, this fact, consider for further calculations. What it is, the measured value on the screen will be larger, and therefore more accurate. Power the pointer, use a battery for flashlight 4.5 V.
3
Install the wheelson the second fixture - a mirror, which will serve as a reflector beam pointer on the screen. Fabricate bolts from the standard wheelstion, increasing their studs. Third fixture - centering screens. Platform for adjustment of the alignment should distribute load evenly on all wheels. For easier turning of the front wheels, use two metal plates, between which place a layer of grease. Install them under the wheels.
4
Install screens at any distance from the reference sites. The surface of each screen must be parallel to the longitudinal vertical plane of the machine, i.e. be horizontal. Otherwise, in the measurements of the angles errors will show up. If the screen is on the wall, then apply a field tolerance of the beam, this will enable easy-to-follow to navigate, without making repeated measurements.
5
Put the centering screens in place of the reference sites. Turn on the radiators-pointer adjust the beams so that each of them just passed through holes in them and fell on the opposite screen. After that, get them.
6
Install the car's front wheelsAMI on a reference platform, and secure the reflectors, changing the regular bolts alternately for special. Measure the distance from the center of the screen to the mirror surfaces of the reflectors. Lift one of the front wheels and turn on the emitter.
7
Scroll wheelabout: the reflected beam on the screen describes a circle. Install the beam at the top of the circle. Adjust the reflector so that the beam only in one point. Thus, the mirror surface will be parallel to the plane of rotation of the wheels.
8
Lower the wheelabout with a properly adjusted reflector and do the same with the other. Promote suspension. To do this, press several times on the front of the machine, roll it a little back and forth and re-install on the support site.
9
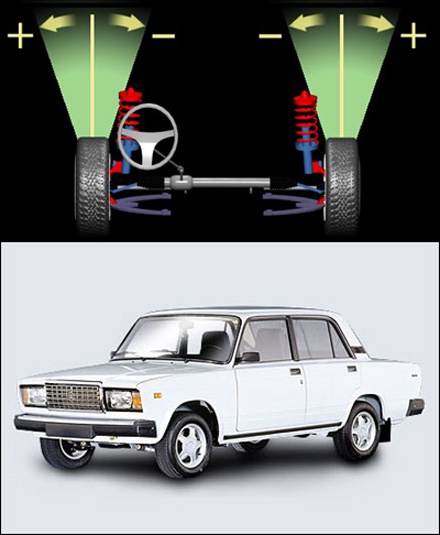
Measure the camber angle, to do this turn the steering wheelabout so that the beam fell on a vertical median line or near it. The camber angle of the wheels is equal to the deviation of the beam from this line. It is considered negative when the beam is reflected above the horizontal middle line, and positive if below. The measure of the angle calculate by the formula sin = a/2L, where a is the deflection of the beam, L is the distance from the screen to the reflector, 2 is a coefficient. For the classics VAZ it borders with L=1 m 0°5±20', this corresponds to a deviation on the screen - and = 2-0,00145-1000 = 2,9 (±11,6) mm. adjustment of the guide by placing a washer under the bolt on the front beam.
10
Set toe control of the wheeland so on one of the screens in the beam impinge on the vertical middle line. At the same time on the second screen and measure the deviation from it. Calculate according to the formula: b = 2CXLD, where L is the distance from the reflector to the screen CX – convergence, D - diameter of drive wheels (VAZ - 360 mm), 2 - coefficient. Adjust toe-in by varying the length of steering rods, try to maintain their approximate equality.