You will need
- — computer
- — Adobe Photoshop
- — photo
Instruction
1
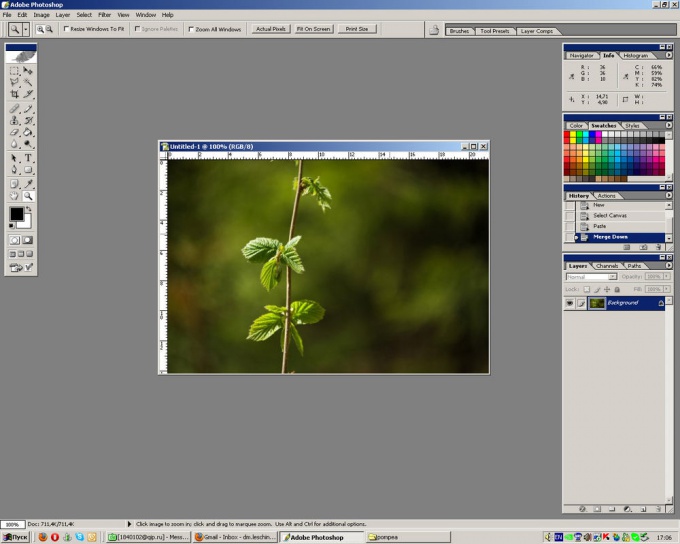
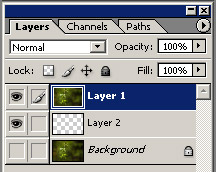
Click the photo for the experiments. Open it in photoshop and look at the layers window (on the screenshot below left). Now you have only one layer (Background), and it is locked.
2
Right-click on the Background layer, select Duplicate Layer and click OK (or Ctrl+J). Then create a new layer (Ctrl+Shift+N), place it between the background and its copy as shown in the screenshot (you can fill him with some color, for example white). A locked layer off (click the "eye" on the left) or delete it.
3
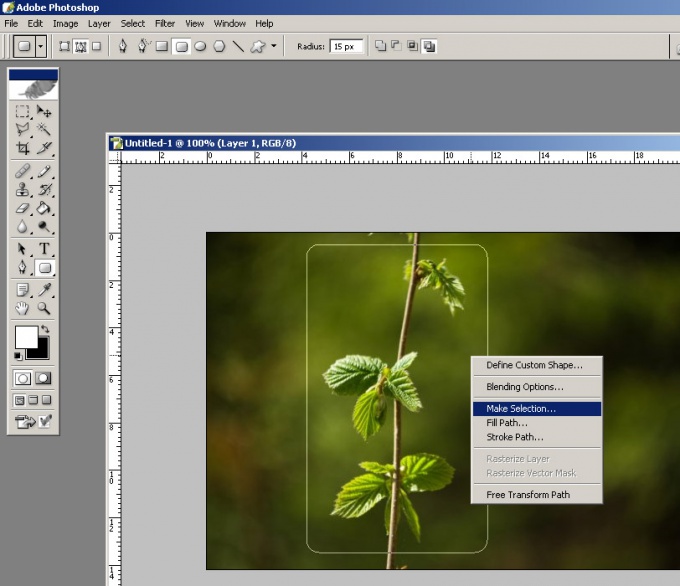
In the tools palette, find the button with the rectangle Tool) and hold her for a second with the left mouse button. There will be additional menu, where you select the second line (Rounded Rectangle Tool). The setting at the top will expose the same as in the screenshot, and the Radius change (the larger the value, the more rounded will be the corners, and the larger the image will be cropped.
And then on the picture, highlight the portion you want to use (e.g., as avatars). If you make a mistake, press Esc and repeat the selection. Once the desired location is highlighted, click it, right-click and select Make Selection... and press OK.
And then on the picture, highlight the portion you want to use (e.g., as avatars). If you make a mistake, press Esc and repeat the selection. Once the desired location is highlighted, click it, right-click and select Make Selection... and press OK.
4
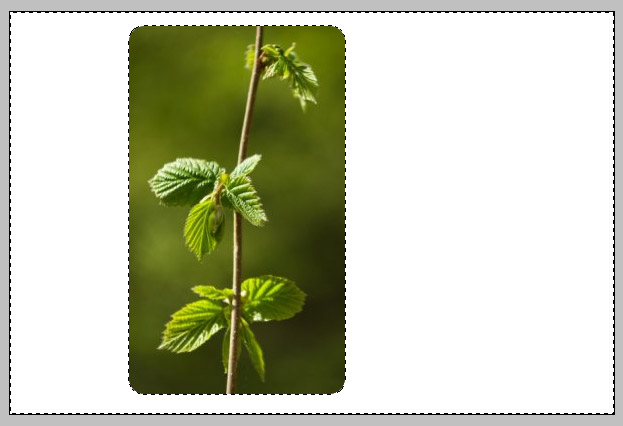
Around the snippet, the selection handles appear. Press Shift+Ctrl+I to invert the selection (or Selection→Inverse). Now press Del or Backspace to crop the photo on the created frame.
5
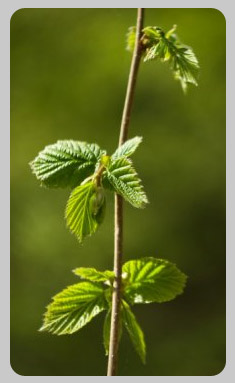
Ready, you got a layer with rounded corners. Now on layer 2 (the one that serves as background) you can fill with any color or left transparent.
Note
Transparent png file- a great format, but not all online services (social networks, blogs, etc.) support transparent png files. If the effect of rounded corners does not work, there is another way.
Select the background (Layer 2) color that is closest to what is installed on the page where you post a photo. Then save the file in jpg format.
Select the background (Layer 2) color that is closest to what is installed on the page where you post a photo. Then save the file in jpg format.
Useful advice
If you leave the background transparent, it is recommended to save the file as a PNG 24 with transparency.
