You will need
- - PVA glue;
- newspaper;
- - black plastic;
- sunglasses;
- mannequin hat head;
- cream;
- - a container of water;
- - scissors;
- - cardboard;
- - Scotch;
- pencil;
- - two belts with buckles or hat;
- - elastic band;
- - emery papers;
- black paint;
- transparent Polish.
Instruction
1
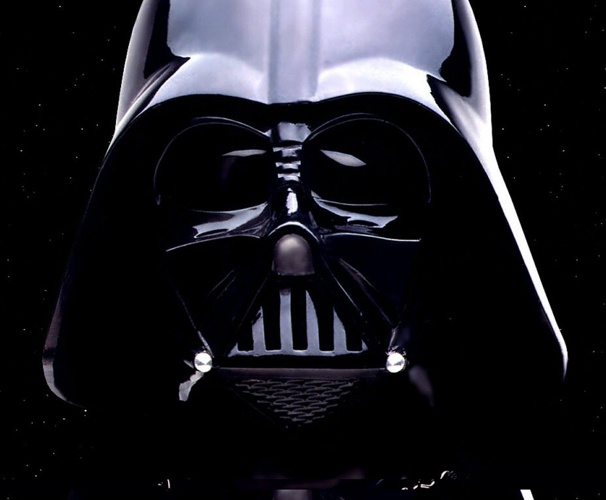
Start the helmet of Darth Vader with the formation of the upper removable part. Pick up a form for the future of the helmet slightly larger than your head. It may be an elongated balloon, mounted for stability on the right size bowl or factory mannequin hat head face.
2
Lubricate the form of a cream. Start to impose a shape with pieces of paper soaked in water, to the level of the eyebrows. After the entire form is covered with a layer of wet paper, start putting some pieces dipped in glue. Apply glue as much as you need to fully impregnate the paper. After finishing one layer, proceed to the next. After every four layers, let the form dry. It is desirable to achieve a thickness of 4-5 millimeters helmet. After drying, the helmet will be much stiffer and stronger. Remove the finished part from the mold.
3
Take one or two sheets of opaque black plastic. For this purpose, suitable plastic folder for papers, which are sold in office supply stores. If you took two sheets, then they need to be joined together at the edge. Attach the plastic to the earlier of the helmet so that it covered the middle of the back of the neck. The side edges of the plastic cut away diagonally so that the formation of the supraorbital ridge of the helmet. Edges connect to each other by means of an adhesive tape glued to the inner side.
4
Now start making the mask of Darth Vader. For this purpose, suitable mannequin that you used in the previous stages, or any mask that you. As well as the upper part, glue the face and front part of the neck of the dummy paper soaked in glue. Form of paper the zygomatic protuberances, typical for the mask of Darth Vader. Given that these projections are high enough to make them two crumpled pieces of paper, pasted on top of larger layers of newspaper.
5
Form of cardboard speech device mask. It should look like a hollow triangle with a grid inside. After the mask dries, stick to her speech device. Remove the mask from the form and carefully trim off its uneven edges.
6
Prepare the material that will turn a blind eye. That can be lenses big sunglasses or ovals, cut from plastic folders for papers. Plastic should be relatively transparent so you could see. Put ready lenses on the mask at the locations of eyes and circle them with a pencil. Cut out the eye holes slightly smaller than the diameter of the lens. Place the lens on the inner side of the mask to the eye area and secure them with glue or tape. Made of paper soaked in glue, rollers over the edges of the lenses. This will give strength to mount lenses.
7
Make the side edges of the mask, two holes and thread them with ribbon clasps at the ends or hat elastic.
8
Take the sandpaper with the fine grain and treat it with all the parts of the helmet that are made of papier-mache.
9
Paint all the details out of papier-mâché with black paint. If you are using spray paint, cover all plastic surfaces with paper and tape. Thus you will protect the plastic from accidentally dripped paint. After the paint is dry, coat all painted surfaces with clear varnish. Let dry the varnish. Remove the protective coating from the plastic. Helmet ready.