Instruction
1
Base panel attached to the body in 5 places. The two nuts you need to Unscrew the sides, the screws and the glove box and two screws from the bottom panel. The mount is on the ears, which often break down. In case of breakage, it can be glued with superglue. Keep going steady. However, the mounting panel still needs to be strengthened.
2
The panel can be fastened with screws to the stove. You can also try to reinforce the lugs with metal. Panel top edge rests on the gasket of the windshield and below the reinforcing beam. The panel can be screwed into this beam. To do this, drill holes in the panel. Fasten three screws, having a length of 50 mm. To avoid breakage of plastic under the screws you can put large washers. All this needs to cover up the sealant.
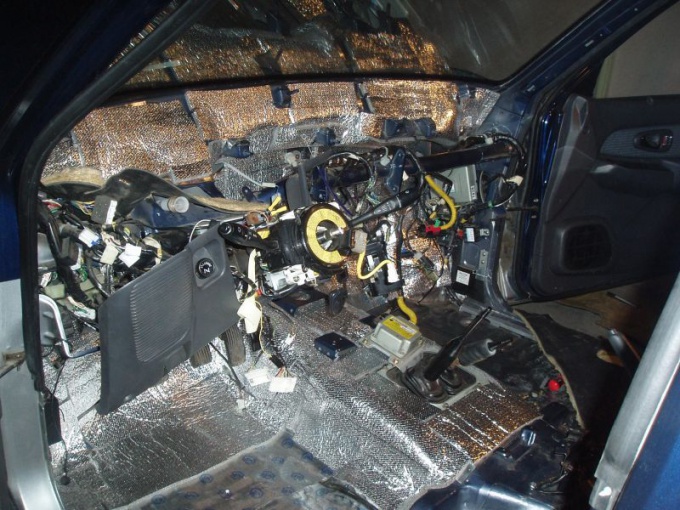
3
Do sizing of the panel. First, pay attention to the part which is adjacent to the body. It is necessary to paste over with a thin sound absorbing material. The lower plots treated inside isomata, and over – bitoplast. Pay attention to the cracks that exist between stove and air ducts. They need to put bitoplast.
4
For better thermal insulation pasted over the cover material of air ducts. Then around the edge let bioplasty stripe width of about 15 millimeters.
You can see the factory deadener. She is a gray foam. Don't forget to treat mitoplasts and the instrument cluster.
You can see the factory deadener. She is a gray foam. Don't forget to treat mitoplasts and the instrument cluster.
5
Check shumaysani cover ducts. When swayed she should not emit squeaks. Often the creaking is coming from places where the contact ribs that direct air to the windshield, with trim panel. Glue them on a strip of bitoplast. You can also use black cloth tape. Squeaks are issued mostly when the heater's on. This occurs due to the heating and expansion of plastic and plastic parts.
6
For the sizing of the visor panel you need to use vizomat and strips of bitoplast. Iron clips, which cling to the loser, be sure to stick to sealant. They make a lot of scratch.