Instruction
1
Before construction of the facility will determine the place of its location. It must satisfy the following conditions:
• to be away from water sources (boreholes, wells, ponds, etc.) no closer than 30m. With the exception of biotoilets or powder-closets, i.e., the design of which eliminates the ingress of harmful substances into the environment;
• be located considering the prevailing wind direction (in order that the smells from the toiletand did not spoil the air and do not spoil your life);
• building the toiletand should not towering over the local landscape, attracting unwanted attention, but should not stand in the valley, so rain and melt water not to study it.
2
Determine the installation location, proceed to selecting the type of toiletand: biotoilet, backlash-closets, powder-closet. Consider two factors: if the depth of the aquifer in the suburban area of more than 2.5 m and there is a possibility of the entrance of septic system cleaners, septic tanks, and can equip any type of toilet. Otherwise, biotoilet or powder-closet.
3
Begin construction with the arrangement of the sump. It can be of various shapes: round, square, rectangular. The depth of the pit make a little less than 2 meters. The bottom of the pour a layer of sand, on top of which lay the gravel. The thickness of the drainage layer should be 15-20cm. Then reinforce the walls. This will overlay them with a brick. You can also make the wood, impregnated with antiseptic panels, upholster them with mesh and plaster, and you can use ready-made concrete ring.
4
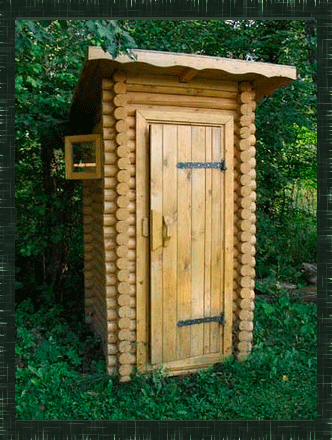
"Building a toiletfor the convenience, gather around the prepared cesspit. Optimal dimensions: width 1,0-1,1 m; length 1.2-1.3 m; height 2.0-2.2 m.
Of timber 100x100mm make the base of the toiletand its size should be 50cm longer than the actual width and length of the toilet. Further, when installing the toiletand, it will give him more stability.
Then make the boards from 50x50mm timber and cut boards for the two side and rear walls. To the rear outer side to secure the chute, one end of which dip into the cesspool, and the other lift it up over the roof and close the shade. This will be the exhaust ventilation.
5
Assembled the base of the toiletand (with the floor and a pedestal with a hole in it) install on pre-prepared bed of gravel and waterproofing so that it is more than half closed.
On the installed base of the secure side and rear walls, front side walls connect the three boards 50x50mm. One Board attach to the Foundation level, the second at the height of the future door, the third Board under the roof sheathing. At a distance of 10cm from the side walls, between the bottom and middle beam install 2 vertical beams. The result is a doorway.
Separately make a door and hang it on the door hinges, which pre-fix to vertical timber screws.
6
Organize the toilet, which put the inside constipation outside the helicopter door. Cover roof, which will use any roofing material. Paneling panel wall toilet.
The part of the cesspit, which is beyond the dimensions of the toiletand cover, which make the hole for the hose as the car and also cover.
Paint or stone, toilet ready.
The part of the cesspit, which is beyond the dimensions of the toiletand cover, which make the hole for the hose as the car and also cover.
Paint or stone, toilet ready.
Useful advice
For a more comfortable existence in the country use special preparations for toilets and cesspools (bioactivators) - they will help you in the care of the toilet, decompose waste in cesspools.