Instruction
1
Log-in to the CMOS Setup. To do this, turn on or restart the computer. Perform a restart not a Reset button, and full-time means a running OS. Before doing this be sure to save any documents and shut down applications. Immediately after the completion of the OS or apply for a car power start to press the Delete key or F2, depending on the manufacturer and version BIOS.
2
If the CMOS Setup utility will prompt you for a password, enter it. In case you have forgotten the password, and the computer is your own, unplug it, remove the battery from the motherboard, short pins connector for it (but in any case not the battery), and then install it back in the correct orientation. You can also use a special jumper for clearing the CMOS, if any. Then apply power the computer, re-enter the CMOS Setup and set the new password.
3
Mouse in BIOS setup utility usually doesn't work. The arrow keys move the pointer to the option called Advanced BIOS Setup or similar. Select the tab item Extended Memory Test (the name may vary). The keys Page Up and Page Down set the value to Disabled. In some Bios versions, it can be done with other keys, and instead of the words Disabled and Endbled - words No and Yes.
4
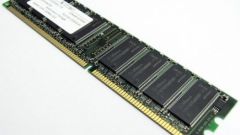
Press the F10 key. Then press Y or Enter, depending on what the message will be displayed. The computer will begin to boot. Make sure that there were no RAM test. Note that the test built into the BIOS not able to detect all the defects in the operational memory. For a more thorough test, use Memtest86+. She works much longer: full testing cycle takes about an hour, and when a large amount of RAM or low speed processor - up to three hours.