You will need
- generator;
- bolts;
- keys;
- - screws;
- - washers
- - voltmeter.
Instruction
1
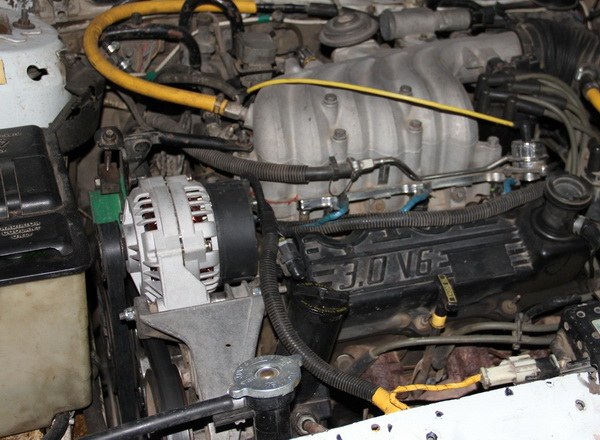
Installation of the generator, as well as its removal, is performed on the lift or in the pit. Place the new generator in the designated location (near the engine) and lock its location with the bolt and washer. Then put on the nut of the bottom fastening of the generator.
2
Put two wires from terminal "30": 1 wire going from Central plug of the output stator winding, and the wire 2 coming from the brush holder "67". Be careful not to confuse the wires! A distinctive feature of the wire 1 and the output of "67" - the lack of insulating pads.
3
Attach the nut of the wires to the output of the automotive generator and put it on top of the output "30" rubber protective cap. Then fasten the nut with which the generator is attached to the tension strap.
4
Slip the belt of the generator first to the crankshaft, then on the pulley of the generator and only then on the pulley of the pump. Then reinforce the tightness of fastening of the generator to the tension bar, located in the engine compartment.
5
Install the splash shield and secure it by tightening the 12 screws. That's it: the generator set on its rightful place.
6
After the installation of the generator drive it check. Although there are three way to verify that the alternator (on the car with an oscilloscope, and a stand), the most affordable home testing is the generator on the car.
7
Start the engine, when the engine speed is 2500-3000об/min and the battery is fully charged measure the voltage on the battery terminals. If the result is greater or less than the normal value (14 V), the problem most likely lies in the relay voltage. If after replacing the relay voltage indicator deviates from the norm, mounted on car alternator needs to be repaired.
Note
Do not test alternator by disconnecting it from the battery! This can lead to a spike voltage of the generator will burn out the rectifier.
Useful advice
The "minus" terminal of the battery, you can throw only if the headlights on high beam: this will prevent sudden power surge.