Instruction
1
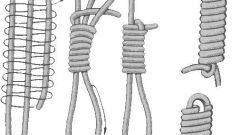
To one hand to tie a knot right on the end, wrap the thread around the index finger for two or three turns so that its tip is not sticking, roll into the turns and hold them between thumb and forefinger. Twist them into one ring these fingers, as if you spin the pencil or salt food, and make into a knot, gently pulling the thread.
2
If the tip still stuck, try to modify the technique: in free flight tie a simple knot, a tail clamp fingers of the left hand and right hand roll the knot to the very end of the thread - node will rise exactly in the place where you wish.
3
Quite simply loose node "drive" the needle to "aim" for its location. Insert the thread in the needle, then tie the knot the two tip threads where you are comfortable, but do not tighten, the needle insert into a knot and tighten it directly into the needle. Now the left hand grasp the threadand pull to the right in the direction of the needle with a knot on it. All node "ran", you have only to choose a place for him at the end of the thread.
4
If "rolled" the node you did not succumb, make the "air" lace up. Fold the thread in half, thread the needle, make the first stitch, after which pull the thread into the loop. Fast, easy, and invisible knot ready.
5
Not to tie a knot at all, starting to sew, press the fingers of the left hand the tip of the thread to the fabric and make the place three or four thick stitch. This will fix it and will become a knot. But this method is only suitable for thick fabric.
Useful advice
If "science bag" you is difficult, and the knot in the thread still turns "tail", simply use sharp scissors to trim off the excess tip. You can singe it with a lighter – so your knot won't unravel at all, especially on a silk thread.


