You must understand well all the steps of creating a stencil. First selected or created independently of the original drawing, then it is modified by the technology of applying paint stencil, this is the most complicated and responsible process. Then the blank stencil is printed, and at last a sharp scalpel with the stencil removed unnecessary portions.
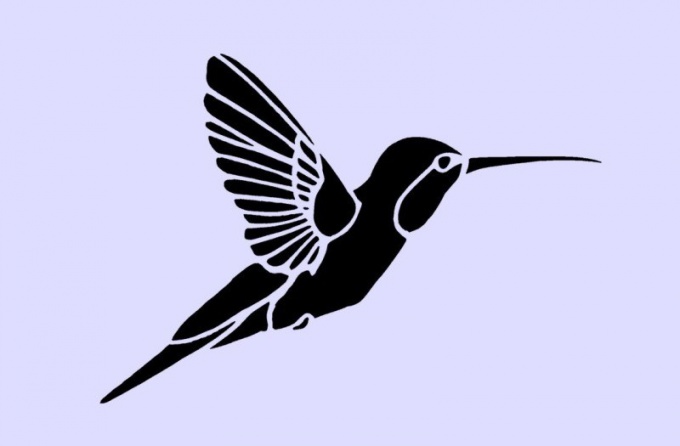
Not every figure can organically turn into a stencil. Looking at the picture, you must imagine how it will look in solid color, which areas are visible and which are not. It is a true art that requires great experience. Therefore, to study the manufacture of the stencil is better at some simple picture or text label.
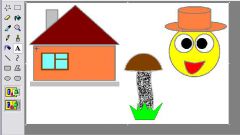
To create a stencil you can use almost any graphics program, for example, perfect Photoshop. First, set the canvas size in accordance with the size of the future of the stencil, then place it on the illustration, you can use the option insert. Resize the pasted image as desired. Then determine which parts of the image will be clipped – color them in any color, such as black.
Filling in all of the deleted sites, see did not happen so that some of the elements of the stencil were completely cut off from the basics. For example, in text stencils can be dropped out midway of the letters "O", "R", "B", etc. In this case provide a thin binder partitions between it and other areas of the stencil. The same goes for long lines – if you, for example, make a stencil of a rose, the long stem is to cut a sheet of paper. This stencil will be unstable, therefore, it is necessary to provide on the stem a few ties.
After the final simulation of the pattern and print it on a sheet of white paper. Look at the picture – get the effect you wanted to achieve? That looked nice on the original drawing, doesn't look good in the form of a stencil. If something in the layout of the stencil ugly, think about how to change it.
Print stencil best on photographic paper. The paint will be applied from the gloss: when you remove the stencil, you can easily erase it with the sponge paint. With plain paper or cardboard so it does not, they get wet and warp.
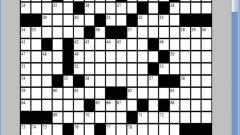
After printing the stencil comes a very important operation – cutting out the shaded areas. The stencil is placed on a piece of cardboard or linoleum and with a scalpel, very gently removes unwanted areas. Alternatively, you can use sharp nail scissors, they do a good job with this task.
Cutting out the stencil carefully and clean lines. They should be smooth, without burrs. Any violation will be reflected on the drawing made with a stencil.
If the finished stencil is a little warped, put it about a day in the book and press load. After that it will become completely flat and useable.
The creation of the drawing for the stencil
Not every figure can organically turn into a stencil. Looking at the picture, you must imagine how it will look in solid color, which areas are visible and which are not. It is a true art that requires great experience. Therefore, to study the manufacture of the stencil is better at some simple picture or text label.
To create a stencil you can use almost any graphics program, for example, perfect Photoshop. First, set the canvas size in accordance with the size of the future of the stencil, then place it on the illustration, you can use the option insert. Resize the pasted image as desired. Then determine which parts of the image will be clipped – color them in any color, such as black.
Filling in all of the deleted sites, see did not happen so that some of the elements of the stencil were completely cut off from the basics. For example, in text stencils can be dropped out midway of the letters "O", "R", "B", etc. In this case provide a thin binder partitions between it and other areas of the stencil. The same goes for long lines – if you, for example, make a stencil of a rose, the long stem is to cut a sheet of paper. This stencil will be unstable, therefore, it is necessary to provide on the stem a few ties.
After the final simulation of the pattern and print it on a sheet of white paper. Look at the picture – get the effect you wanted to achieve? That looked nice on the original drawing, doesn't look good in the form of a stencil. If something in the layout of the stencil ugly, think about how to change it.
Carving stencil
Print stencil best on photographic paper. The paint will be applied from the gloss: when you remove the stencil, you can easily erase it with the sponge paint. With plain paper or cardboard so it does not, they get wet and warp.
After printing the stencil comes a very important operation – cutting out the shaded areas. The stencil is placed on a piece of cardboard or linoleum and with a scalpel, very gently removes unwanted areas. Alternatively, you can use sharp nail scissors, they do a good job with this task.
Cutting out the stencil carefully and clean lines. They should be smooth, without burrs. Any violation will be reflected on the drawing made with a stencil.
If the finished stencil is a little warped, put it about a day in the book and press load. After that it will become completely flat and useable.