You will need
- Hard disk, power supply adapter for SATA, screwdriver under the cross.
Instruction
1
The second Winchester not only allows you to obtain additional space for files, but also significantly improve the reliability of data storage due to mirroring of important files on different disks. Before you start working on the hard drive installation, make sure that the computer is disconnected from the network! Then Unscrew the screws holding the left (when looking at the front of the computer) side cover. Note that different types of cases the procedure for removing the cover may differ, for example, may first be necessary to remove the front panel. Removing the screws, gently remove the side panel. Maybe it will have slightly pulled back.
2
After removing the panel, you will see your computer's motherboard, power supply, various wires and cables. And, of course, the hard drive, it is usually placed horizontally at the front of the computer. Pay attention to how he installed the second hard drive will have to be set exactly the same in niche. These niches are above or below the main disk. If possible, do not place discs directly one above the other – between them should be left a gap, it will help them better cooling. Important point: the hard drives have a special jumper, which sets the mode of operation. On the primary hard drive jumper must be set to "Master". The second – in the Slave. Jumpers are very small for their installation, you may need the tweezers. Placing the jumper, carefully place the disk on is selected for his place, tighten the retaining screws. Complete with Winchesterohms they usually do not, so a couple short screws, you should look for in advance – they must match the thread holes on the left and right side walls of Winchester.
3
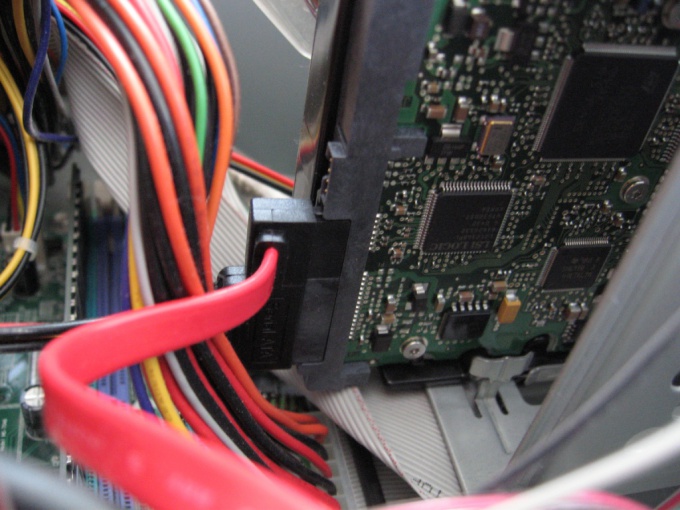
The disk is installed, is to connect the power and cable data transmission. For power supply you may need an adapter to the SATA drive. Best of all-before you buy Winchesterand to open the computer and see whether the adapter on the existing drive and if worth to buy the same. When connecting pay attention to the shape of the connectors and color matched to the wires it the primary drive – the new drive should be connected the same way. To connect the adapter, use any available connector from the wires of the desired color. Food connects one connector, the whole process is very simple. And most importantly, do not use force – all the connectors are provided with special protrusions, not allowing you to install them incorrectly.
4
The power is connected, now it is necessary to connect a loop of data transmission. When buying a drive make sure that the plume is present in the kit. If not, acquire it. This is usually a flat wire red color with connectors at the ends, a width in the range of centimeters. One end of the ribbon cable connects to Winchester, you will easily find the desired connector. The second is connected to a corresponding socket of the motherboard. To find it, look where the ribbon cable is connected the primary drive socket for a second (and often third and fourth) must be nearby.
5
All the drive is connected. Put the cover back in place, turn on the computer. If everything is connected correctly, the computer will begin to boot. After downloading, open "My computer" under hard drives you should see a new disk. If you do not like assigned to it system letter, go to: Start – control Panel – computer Management. Under "Storage" select "disk Management". Clicking a new drive, right-click, choose "Change drive letter or drive path". A window opens, select "Modify" and set the desired drive letter.
Useful advice
If you are you have to disconnect some cables, now paint on a piece of paper their connection. This will enable you to connect them correctly.