Instruction
1
Carefully read the manual of your player. Pay special attention to the section devoted to the connection/disconnection of player and transfer files onto it from the computer.
2
On that computer, install the software from the disk that comes with the player. On the drive there are driver and software to transfer files (not for all models). If in the box with your player did not have such a disk, feel free to skip this step.
3
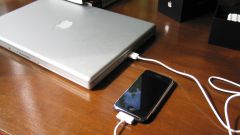
Connect the player to a computer or laptop that contains the music files for download. Do it using the regular cable from the kit or other suitable (USB/micro-USB or mini-USB).
4
After the system detects your device, on a computer screen, a window will appear. In it you will be asked to choose one action from several options. Select "Open folder to view files" and click on it. What you will see in the window depends on the model of your player. Usually there are system folders/files and a few test tracks. It is possible that there will be a Music folder, in which you will need to copy your favorite music. You can also create the folder, as well as any other at your discretion.
5
Open the computer folder with the music you want to download to the player. Window the player remains open. Using the mouse, drag the desired folders/files. All this you can also do in Windows Explorer.
6
Use to download music player software from the CD-ROM manufacturer, if any. Thanks to the intuitive interface of such programs, to upload music into the player is not difficult.
7
Before you disconnect the player from the computer, click on the icon for "safely remove hardware and eject media" on taskbar. Select "Eject (name of your device)". Waiting for the system message that the device can be recovered, unplug the player from the computer.