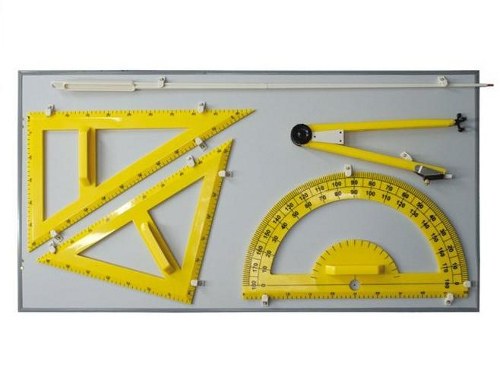
You will need
- - a set of pencils for sketching different hardness;
- - the range;
- - gon;
- a pair of compasses;
- eraser.
Instruction
1
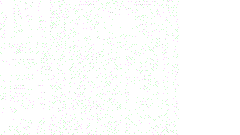
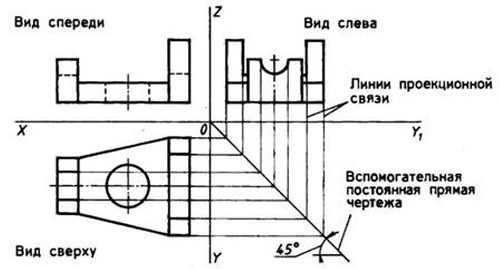
Projection relationship between the parts is preserved at any distance between the images of the three types of this detail in the drawing. Due to this connection with two projections to build a third missing. Let you this kind of detail in front (front view) and side view (profile view). This assumption is valid for any two projections, because the item can be rotated arbitrarily.
2
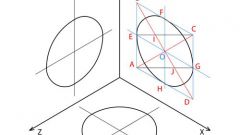
Swipe a thin vertical line between the frontal and profile projections. Extend this line down to the level desired at the third projection. Swipe a thin horizontal line under these two projections at any distance. The third projection will be built below the horizontal under front projection. Auxiliary vertical and horizontal lines serve to construct the third projection part.
3
Build projections of all vertices of the two available types of items on the auxiliary horizontal. In other words put down the perpendicular horizontal support of all the vertices on the frontal and profile projections. Perpendicular drawn from points on the front surface, extend below the auxiliary horizontal line to the desired placement of the third projection. You got the width has not yet drawn the third projection. The perpendiculars drawn from points in profile projection, horizontal no need to continue.
4
Put the needle of the compass at the intersection of the auxiliary vertical and horizontal. Pencil compass, set the point of intersection of the auxiliary horizontal and the perpendicular from the point profile projection. Received radius make a mark on the auxiliary vertical down. In the same way using the compass, move the projection of all vertices of the profile projection support horizontal support vertical.
5
Restore the perpendiculars to the vertical auxiliary line from a transferred projection of the vertices of the profile of the projection part. Extend the obtained perpendicular to the intersection with the already constructed lines of the third projection.
6
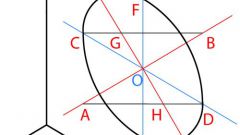
Finish drawing the third projection part. Circle the contour of the part and all visible parts of the projection. A dashed line will follow the invisible part. The location of the circles on the third projection are indicated by squares, obtained by the intersection of the perpendiculars to the auxiliary lines. Fill in these squares the circle.
7
To complete work apply dimension lines and dimension.