You will need
- - Arduino;
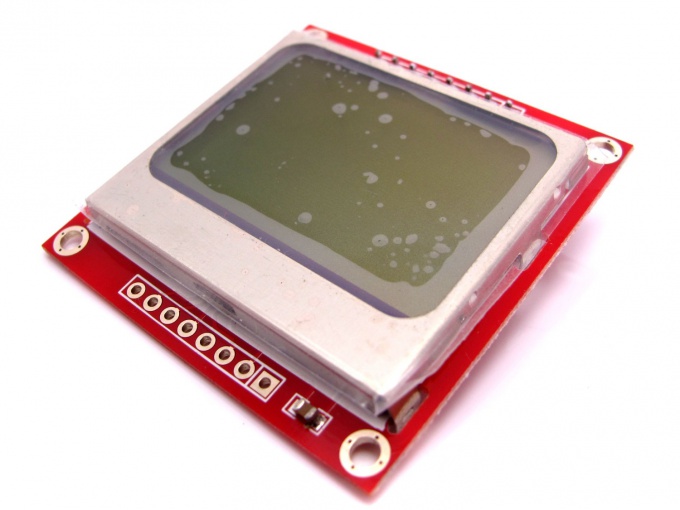
- LCD display for Nokia 5110/3310;
- - connecting wires.
Instruction
1
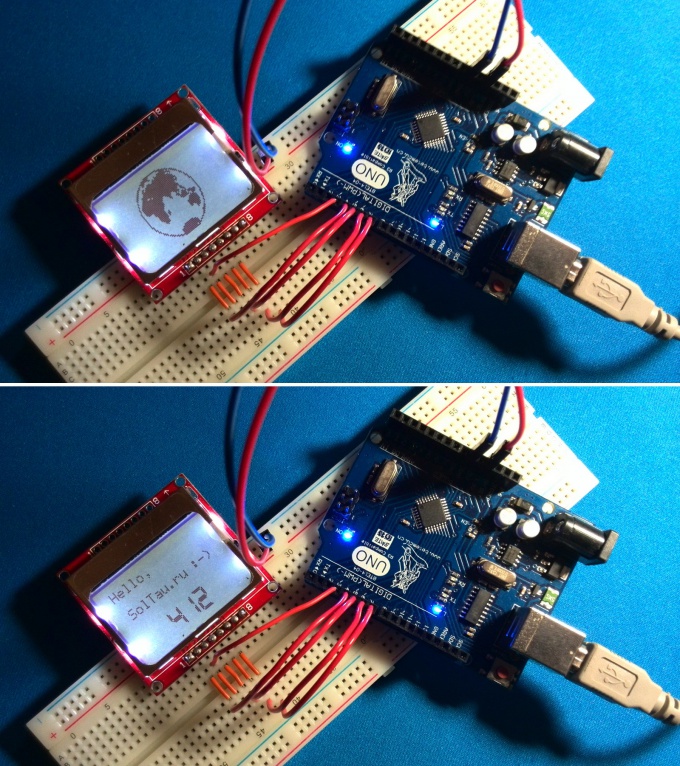
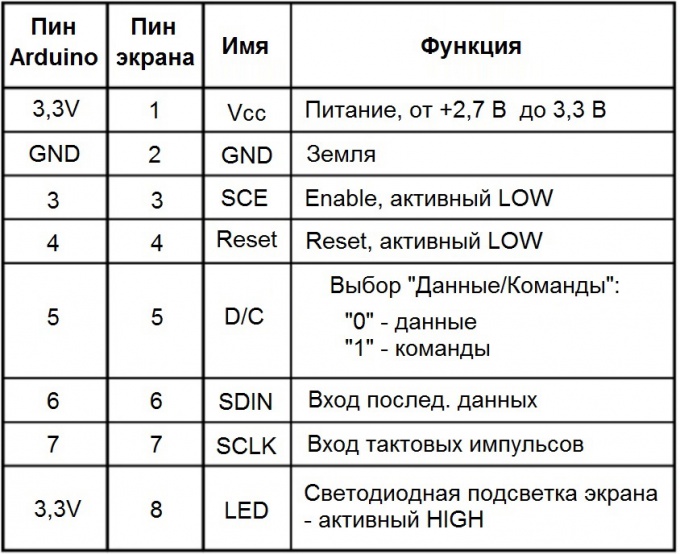
Connect LCD from Nokia 5110 Arduino according to the diagram above.
2
To work with this LCD screen written a lot of libraries. I suggest to use this: http://www.rinkydinkelectronics.com/library.php?id=44 (the downloading of the file LCD5110_Basic.zip).
To install rotaryforum the file to the directory of Arduino IDE/libraries/.
The library supports the following features.
LCD5110(SCK, MOSI, DC, RST, CS); - the announcement LCD screen showing the matching Arduino pins;
InitLCD([contrast]); - initialization of the 5110 display with optional indication of the contrast (0 to 127), the default value is 70;
setContrast(contrast); sets the contrast (0 to 127);
enableSleep(); - puts the screen to sleep mode;
disableSleep(); - displays a screen from sleep mode;
clrScr(); - clears the screen;
clrRow(row, [start], [end]); - clear the selected line number of the row, from position start to end;
invert(true); invert(false); - disabling and enabling the inversion of the contents of the LCD screen;
print(string, x, y); - displays the character string with the specified coordinates; the x-coordinates you can use LEFT, CENTER and RIGHT; the height of the standard font is 8 points, so the line should go, with intervals of 8;
printNumI(num, x, y, [length], [filler]); - print the number on the screen at the given position (x, y); length - the desired length of the number; filler - the character to fill the "voids" if the number is less than the desired length; the default is an empty space " ";
printNumF(num, dec, x, y, [divider], [length], [filler]); - display a floating-point number; dec - number of decimal places divider - sign decimal separator, by default a period ".";
setFont(name); - choose the font; the built-in font called SmallFont and TinyFont; you can define your fonts in the sketch;
invertText(true); invertText(false); - invert text on/off.off;
drawBitmap(x, y, data, sx, sy); - bring a picture to the screen coordinates x and y; data - an array containing the image; sx and sy are the width and height of the picture.
3
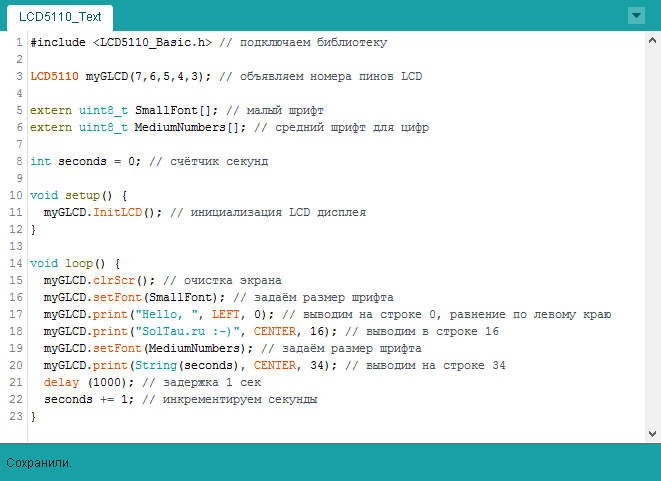
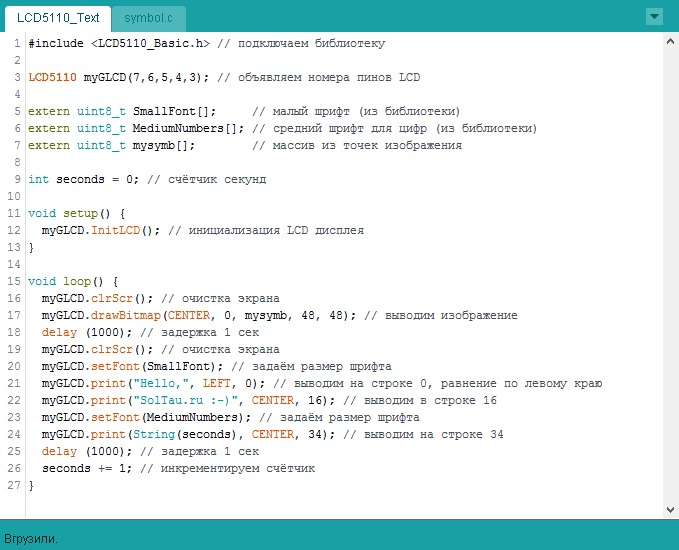
Write this sketch. First, attach the library, then declare an instance of the class LCD5110 with the terminal assignment.
In the procedure setup() initialize the LCD screen.
In the procedure loop() clear the screen and write in the small print arbitrary text underneath - medium font, display seconds counter.
In the procedure setup() initialize the LCD screen.
In the procedure loop() clear the screen and write in the small print arbitrary text underneath - medium font, display seconds counter.
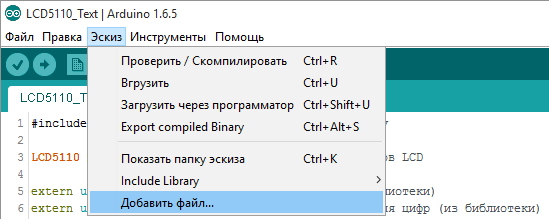
4
Let's display picture. To do this, prepare a monochrome image that you want to display Nokia 5110. Remember that the screen resolution is 48 by 84 points, and the picture should be no more. On the page http://www.rinkydinkelectronics.com/t_imageconverter_mono.php convert image to array of bits. Download the resulting file with the extension "*.c" and add it to the project via the menu: Sketch -> Add file... or just put the file in the sketch directory, and then restart the Arduino development environment IDE.
5
Now we need the code to declare an array with the image data (in my code this line extern uint8_t mysymb[];) and then use the function drawBitmap() to display the image in the desired location on the screen.
6
Upload the sketch in Arduino. Now the text is replaced by the picture, and every time the counter increases its value.