The types of paving slabs
In the Russian market there are two varieties of this coverage vibropressed and vibrocasting tiles. They are made for different purposes. Vibrocasting tiles intended for summer cottages, private homes, where it will benefit a small number of people. This coating is designed for the beautiful design and takes a large load, it is relatively inexpensive and has a large number of different colors and patterns.
Vibropressed tile is characterized by its strength and is used in the laying of sidewalks, and in some cities of Europe it is used as cover for public roads. The cost of such material is significantly higher because its production process is more complicated. However, this material has high durability, cold resistance and durability, making it functional and around a private house.
Preparation for laying
Before you buy the tiles, measure the area you want to cover, and calculate the approximate number of tiles. Decide on the type of coverage that is suitable for your use. Consider the installation of street drains and storm drain inlets. When buying, pay attention to the shape and thickness of the tiles and whether they will cut if the set of transoms. Decide how many pieces of material will need to cover the entire area. If the tile will be installed around the garage, talk with the seller whether it will stand the weight of the car.
Laying tracks is a few days, depending on the surface area. Small tracks can be laid in 1-2 days, and to cover the whole yard takes about 2 weeks.
Also need to buy materials and tools. So, you will need a large amount of sand, curbs, cement bags, durable elastic thread, metal pegs, hammer and rubber mallet. There will also be Nijni shovel, level (preferably laser), a rule, rammer, trowel, broom, Bulgarian (if you need to cut concrete), wheelbarrow, buckets. Depending on your area will determine how many bags of building mixes, it will be possible to do during installation.
Laying tiles
Check put the presence of the slope and produce the alignment of the stacked surface. It should be noted that any platform should have a ramp, otherwise all the water will stagnate on the site. Using a level make sure that the bias was in the direction from the house, but not to her.
Along the line, which is the slope of the platform, hammer two metal peg and pull the string between them. Check the level of tension using a level, attach it under the thread. Then tie to the stake, another round and pull it perpendicular to the first. Tie the loose end to the new peg and hammer it into the ground so that he was slightly above the zero line, depending on slope. Tie the rope to the third peg and pull to the fourth, parallel to the zero line. Connect thread the last peg from the first.
Divide your surface into tracks, based on the length of your rules – one strip should be for a few tens of centimetres of the rule. The measurements were performed from the zero line, put your desired distance and beat the peg. Do the same with the other side, and then connect the stakes with thread, porovnat height with the sides of the rectangle. Thus mark the entire site.
You then need to align the markup, adding the soil. The gap between the threads and the ground should be equal to two thicknesses of the tile. The soil also should be compacted with ramming.
Prepare a mixture of sand and cement in the ratio of 6 to 1. It is desirable that the sand was wet. Spread the mixture over one of the strips and carefully tamp, pre-leveled with a rake and rules.
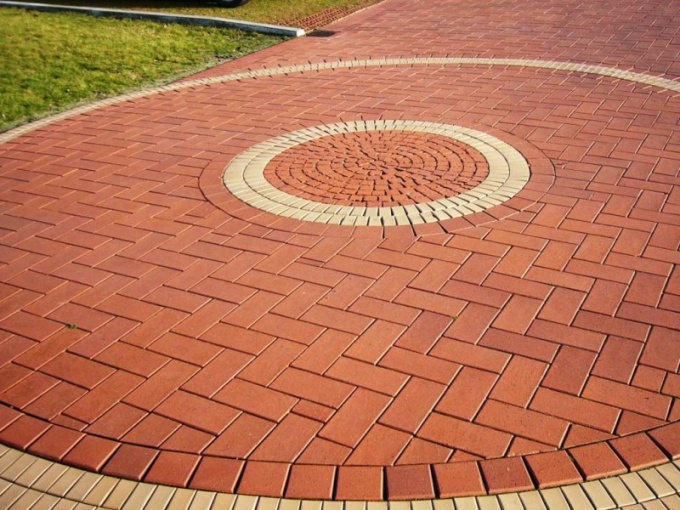
Start laying tiles. The first row is laid as straight as possible and parallel to the plane. From this number you will put all the remaining rows. Each tile should be tapped with a rubber mallet to make the seal a little and sink it in the ground. The stacking sequence depends on the selected picture. Similarly, lay the remaining strips in the selected area.
Laying of the "diamond", "pavers" and "brick" is more complicated and therefore it is not recommended to choose indeed.
If the way will come across obstacles in the form of a gas pipe or a manhole, it is better to bypass the whole pieces and only then do trim and fit. Also during laying can be formed by cracks that need to be filled, spilling the dry mixture at the surface of the tiles, and then generating prometeia.
At the last stage of laying, installing curbs. To do this, dig a small trench to the appropriate width, the depth of which will be selected based on the desired depth of planting. The Trenches are installed curbs and secured by a dense cement mortar. The tile installation can be completed.