Instruction
1
Make sure your printer has the same resolution on both coordinates. To do this, draw in any graphics editor square and print it. Measure the sides of the square ruler measurements should be the same. If not, try to print at a different resolution. In case to achieve the same resolving ability is not possible, use a different printer. In any case, it is desirable that the printer was color.
2
Download the image shown in the header of the article. Resize it with any graphics program, proportioning, to the desired size. Print pattern possibly on tape - then use the protractor will be easier as you will be able to see and those lines which are located directly underneath. If your printer is incompatible with the tape, use paper, but then the protractor will turn opaque.
3
Cut out the printed pattern along the contour. Put it on a sheet of plexiglass and put the outline on it. If the printout is made on paper, the material of the protractor may be opaque.
4
Remove the template from the sheet of solid material, and then with a jigsaw, carefully cut from a copy of the template. Be sure to then smoothen the edges of the workpiece with a file so they are not sharp. Stick to her pattern. If you have used tape, glue should be transparent. In any case, it should not form unsightly stains.
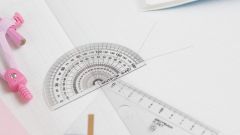
5
When the glue dries, drill through the protractor hole with a diameter of about 2 mm for the pencil. It must be placed strictly in the center - place of drilling is indicated on the template circle. Ready tool has two scales - forward and backward, but if you used a color printer - red divisions every thirty degrees, which facilitates its use.