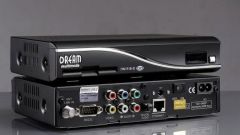
Instruction
1
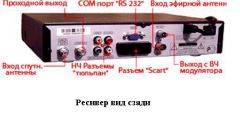
Using high-frequency RF input on the TV. To connect on this input, uses ordinary shielded antenna cable. Connect the power to the receiver and press "Power" button, after which the display should appear the words "Boot". If not, then the receiver is in standby mode, and needs to be enabled from the remote control. Then turn on the TV and run the auto channel search. After that, the TV starts to scan the frequency range, while not automatically stop at the frequency of the receiver. Then the screen should display the menu of the receiver. If this happens, it means you have connected the receiver correctly.
2
Using the low frequency output. Using the low frequency output you can connect the receiver to the TV using a cable with SCART connector or bell connector. Connect the receiver with the appropriate cable to the TV. Connect the power cable from the receiver to the network, turn on the switch on the rear panel and wait for the appearance of "Boot". If not, then turn the receiver on with the remote control by pressing the "Power" button. Then switch TV to video mode, to do this, press on the remote control button "A/V". If you did everything correctly, then on the screen the menu should appear with the settings of the receiver.
Note
The connecting wires you need to use a minimum length to reduce the influence of possible "interference" and to get rid of interference. Once connected, you can start to configure the channels. If the menu does not appear, this means that the signal from the receiver for some reason does not reach the input of the TV. In this case, it is necessary to check the proper connection of all connecting wires, matching of inputs and outputs, as well as the reliability of connections.
