You will need
- a ceiling panel;
- glue;
- construction knife;
- - sheet of corrugated cardboard;
- ladder;
- the pistol sealant;
- - roller;
- brush;
- - primer;
- - ropes;
- - the range;
- - sponge;
- - a wooden beam;
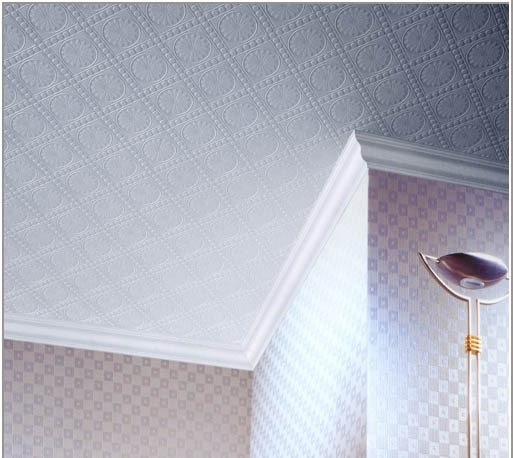
- ceiling plinth.
Instruction
1
Perform the necessary measurements and make a drawing respecting the aspect ratio. Consider the location of the panels on the ceiling and calculate their required number. It is very important to determine the position of the tiles with a precision of a few millimeters.
2
Before buying, inspect the tile. The panels should be smooth and have the same density throughout the area. The presence of "holes" is considered a serious defect. The edges should not crumble. The corners of the tiles should be straight and not jammed. To buy panel recommended stock 4-6 pieces.
3
Select glue. To paste the tiles as possible, you can use "liquid nails". But if you want to stick the tiles so that if necessary it was possible to remove and use elsewhere, it is recommended to use special mastic for ceiling cover or glue for polystyrene.
4
Prepare the ceiling surface. If the ceiling had been whitewashed, you must thoroughly wash off all the plaster - the remains of chalk or lime will lead to the fact that the tiles will come unstuck. Carefully programsuite the ceiling with a roller and brush. Allow primer to dry. If necessary zashpaklyuyte cracks and crevices. The surface should be smooth, dry and free of grease.
5
Make the necessary markup. To do this, define the center of the ceiling. Pull the two ropes diagonally, the point of intersection will be the required center. Swipe through this point two centerline. Mark the location of the panels and verify that the "wall" series are of the same width.
6
Apply glue to the center and in the corners of the tiles. Position it on the ceiling so that one of its corners was strictly in the planned centre. Firmly press it to the ceiling using a piece of wood of suitable length. This will allow you to avoid dents. Remove excess adhesive with a damp sponge.
7
Attach the remaining panels in parallel rows, putting them close to each other. Focus on the previously made markings. To cut the tiles, it is recommended to prepared sheet of corrugated cardboard using a sharp construction knife.
8
Take the ceiling tiles. Apply glue to the adjoining wall and ceiling surfaces, and carefully apply around the perimeter of the room. In order to connect to the throat in the corner, you can use special corner pieces or just trim the ends at an angle of 45 degrees.