You will need
- monomer;
- - colored powder;
- - acetone or special improver monomer;
- - acrylic brush;
- - a glass;
- the napkin is.
Instruction
1
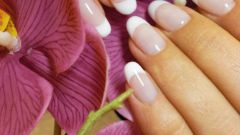
Polish the surface of the nail plate to a glossy Shine, otherwise acrylic flowers bad will fall on its surface. After this, apply nail base coat and varnish – it will become the background for future design. Put it in two layers.
2
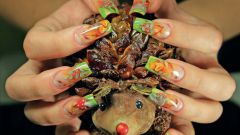
Consider the design of nails. It is best to use a ready-made sample or pre-draw a flower from acrylic as a model.
3
Buy quality monomer in a specialized store of professional cosmetics. Pour the liquid into a Cup and pour a bit of acetone or special improver of the monomer to the painted part of the flower was more plastic and smooth. Then prepare the powder in the desired color.
4
Determine the Central part of the future of the flower and dip a thin brush for the acrylic to the glass with the monomer. After that, swipe the bristles along the edge of the Cup to remove excess air bubbles and moisture.
5
Take the first subtle brush strokes - curved stem of the next flower with two or three wavy lines.
6
Try to mix colors for a smooth transition from one element to another. For example, take the red powder and a small amount of black. Grab a brush a little of the monomer, and then dip it in powder red. Easily touch the red droplet (formed at the tip of the brush) black powder.
7
Draw the first petal of the flower, gently smoothing the gel wand brush.
8
Before proceeding to another element, it is necessary to wait for a few seconds. You can then run a wavy line drawn on the surface of the flower petal to give it naturalness.
9
Do not complicate your task and do not choose too complicated pattern on the small nail plate, it will look too pretentious. Enough to make the flower not more than five petals.
10
When you draw all the petals, try to mix the paints as described above and gently apply them around the flower core.
11
Drip a bead of contrasting colors (or a mixture of two of the major job notes) exactly in the middle of the flower. You can leave the bead as is, or move it with a stick to the edges of the center of the flower to make a bowl-shaped figure.
12
When she is a little dry, drip into the bowl a different one. The basic pattern on the nail is ready. If desired, apply to the nail plate extra touches.
13
Let the acrylic figure to dry completely and cover the nail with a couple of layers of a special protective varnish.
Note
Do not immerse in monomer a brush with the remnants of acrylic! This liquid quickly thickens, and it will be impossible to work. Before each lowering of the brush in the monomer be sure to wipe it with a cloth.