Instruction
1
AutoCorrect works when in settings you select "Automatically correct spelling errors". The option to replace any word that the program recognizes as a wrong, is in a special list. On the one hand, this feature is useful, but sometimes there are glitches: correctly entered word is recognized incorrectly.
2
To remedy the situation, do not have to disable the feature. Click on the Office button in the upper left corner of the window. Select the bottom menu item "Word Options" opens a new dialog box. Click it into the category of "Spelling." Click on the "AutoCorrect Options" in the same group.
3
Additionally, in the opened window locate the word (or words) for which the AutoCorrect mode to apply is not necessary. Select it using the left mouse button and click on the "Delete" button at the bottom of the window. If you do decide to completely disable the AutoCorrect feature, click to clear the marker from the field "Automatically correct spelling errors" and save the changes.
4
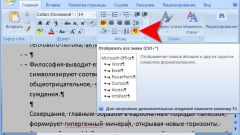
If your document shows all the changes made by you or other users in the text should refer to the tools on the control panel. Open the tab "Review" and make any correctionsalready made in the document. To do this, under "Repair" click on the arrow under the thumbnail to "Accept". In the context menu select "Apply all changes in document".
5
After that disable the fixes. On the tab "Review" in the "Tracking" section, click on the thumbnail to "Fix". When this mode is enabled it is highlighted in a different color, in the inactive state no different from the rest of the buttons of the thumbnail toolbar. Save the document.