You will need
- yarn;
- straight spokes.
Instruction
1
Dial on straight needles 24 stitches. Provarite all 1 row of purl stitch and 2 all series – facial. 3 row elevation start with the front 2 pairs of hinges. The following 2 loops remove promazyvaya them. Working thread hold on the wrong side of the canvas. Finish the number pattern. In row 4 purl 4 tie loops, the next 2 leave nepovezane and clear on the working needle. Place the thread now on the front of the work.
2
Follow these 5 a number of, repeating the scheme of the 3rd, the 6th number - the 4-th, 7 range – diagram 3, 8 range – the 4 series. The entire 9 row patternand provarite the reverse loops, the whole 10 series – facial loops.
3
11 series use the following flowchart sequence loops: 1 loop provarite as the front, and the next couple of hinges remove nepovezane on the working needle. Keep the thread on the wrong side of the work. Then run 1 pair of front loops and continue knitting the row this way. 12 the number of start with the inside loop, then remove the 2 hinges holding the working thread on the front side of the canvas. Provarite 4 front loops. Work thus until the end of the entire series.
4
Repeat the pattern of knitting to 17 range. Namely, 13 and 15 rows, use the chart 11, and for 14 and 16 – chart 12. Continue knitting "SOT", repeating the actions performed in rows 1 and 16.
5
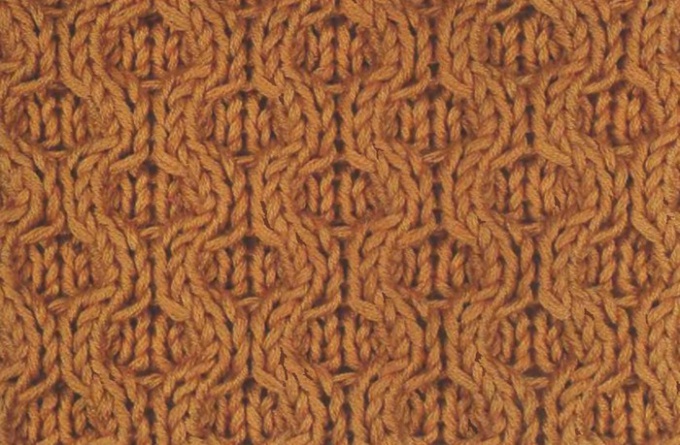
Try also the patent version of the knitting patternand "honeycomb". To do this, enter any odd number of loops. Remember that the pattern will not be included in the edge loop. Do the edge loop, and then tie the front. Remove one loop together with stitches. Repeat until the end of the row, complete boundary edge loop. In the 2nd row do the face and edge loops, and then tie the loop in front of the stitches as the front. Yo remove. Working guide the thread behind the stitches. The element patternand complete a front loop.
6
3 row clear loop with nakida after boundary as the reverse, then provarite other loop with nakida as facial. Continue to the end of the entire series, again removing one loop with nakida front edge.
7
4 after a series of edging loops start with outer loop, then remove yo on the model and re-run the front loop. Do so in the whole series, completing it by a combination of: facial loop to remove yo – edged loop.
8
5 row provarite after the boundary loop of the subsequent together with nakida, remove like wrong and run 1 loop with nakida. Finish the row by repeating these manipulations stitches and provatas together yo and loop. Make edge loop.