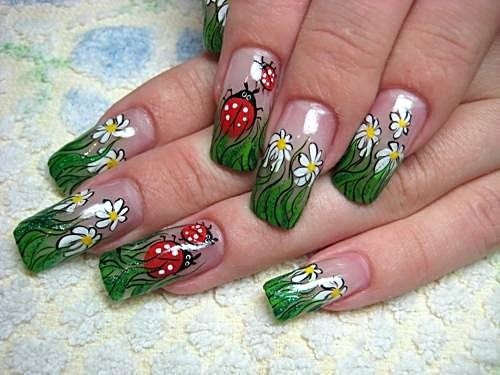
The entire process of creating your nail design can be divided into two stages. First – care of nails. Second – Polish, pattern and accessories.
For the first step you will need the following tools.
Nail file, paper backed abrasive 100/180 or 120/200. You'll cut your nails and shape them. If you just cut them with scissors or special cutters, they begin to stratify and become brittle.
Means for hydrating the cuticle. With regular care it will not dry out, and need to remove will disappear. Max – you will need to separate the cuticle from the nail.
Cream or wax Polish. There are special tools to strengthen and hydrate the nail plate. Many of them are applied directly to the nail.
For the second step you will need the following tools.
The basis under the lacquer. It will protect the nail from harmful varnish and will let last for a longer time. Here we should note that the basics of different companies is not suitable for all varnishes. On one basis the paint will last a week, and another the next day cracked. Everything can be found out only empirically. For example, the basics of "Zinger" "friend" lucky "Orly", "Sally Hansen", "Maybelline".
Nail Polish. Love is not easy. Need to he long held, was not clearly and quickly ROC. Do not think that the more expensive the better. Of course, often the cheap varnish of poor quality. But expensive does not always correspond to its price. The above brands have a big advantage over many others. In General Polish is the basis of design. Therefore, it is necessary to present maximum requirements. It needs to be liquid, exactly to go and be the first a few seconds is enough plastic to be able to carry out the design of "wet" nail.
The top coating. Applied to finished design, all over rhinestones, paint and other things. If you apply it every couple of days manicure will last longer.
Drying. A tool that allows the varnish to dry faster. When the multilayer design is especially relevant. Among other things, the composition contains oil, which makes the nail for some time slippery, reducing the probability of "grease" figure.
The nail design. Usually have a long elongated tube and a long, thin brush. They created the drawings.
Acrylic paint. You can buy them in specialized stores or regular stationery. They are somewhat easier to make drawings than paint.
Brush. Special brush for manicure. A lot of them. There's brush "hair" - long and thin, usually at three in the set have different lengths. There are with a beveled edge, fan-shaped, straight, with a sharp tip. They are very dense and shove.
Needle. Device, pointed at one end and with an eyelet at the other. Design on the wet nail. Made of metal. You can replace with a toothpick or a stick to remove the cuticle.
Dots. Tool with a ball on the end. Used in the design with acrylic paints.
Dust. Metal powder of different colors. The analogue of glitter nail Polish. It is applied on almost dry manicure wide brush and is secured with a transparent varnish or top coating.
Accessories. Rhinestones, sequins, feathers, dried flowers, foil, mesh, beads (small coloured plastic balls), sequins will add variety and sparkle to any design. If you are not near a store for a manicure, all these things or their counterparts can be bought in the store for needlework.
The main thing – the imagination, then using simple readily available materials you can make beautiful designs. You can just paint your nails gel pen and fix all the upper floors.
