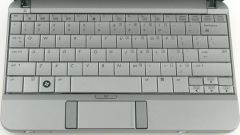
Fortunately, the desktop suddenly broken and the keyboard it is easiest to replace with the spare (which you can ask from friends or buy them the benefit of the keyboard — not the most expensive component of the computer). It's more complicated with a laptop keyboard, which to replace is not so simple. However, in some cases, even an inexperienced electronics user with proper care and accuracy able to fix the keyboard. Consider the most common problem of the laptop keyboard associated with exposure to fluids of different origin. In this case, you must:
- Shut down the computer, disconnect the power supply open the battery compartment and remove the battery. Each second of delay is fraught with leakage of fluid into the laptop and short circuit can transform the problem of repair keyboard problem selection and purchase of a new laptop.
- Gently unplug the keyboard, rinse it thoroughly with plenty of water (do not use any detergents, they could damage the insulation of the conductors themselves wirings), dry, reconnect and test. Drying the keypad should be in a moderately warm place, away from open flame and direct sunlight, for at least a day. To accelerate drying, use a fan. Remember that the keyboard has a complex shape, and the lack of moisture on the surface does not mean that inside the keyboard it also has disappeared completely.
- If the keyboard still does not work totally or partially, a chance to fix the keyboard still remains. For this you need to restore the wirings. This can be done with conductive paint. If in the computer lounge it was not, please contact the store accessories and ask liquid for the repair of threads of heating of back glass, it is fine.
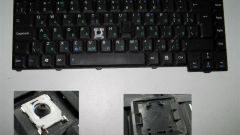
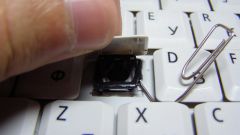
- Before you disassemble the keyboard, take a picture or copy the key layout.
- To remove keys are conveniently dental hook, although fit and thin hour screw-driver. Remove all the keys.
- Remove the elevators, which are mounted keys. To make it easier, because now all the connections in the mind. This will open up access located on a substrate of aluminum plastic boards, which are deposited on the wirings. If they are glued, use a hair dryer to heat and neat separation.
- Swipe paint over the damaged track. Dry the keyboard, assemble in reverse order and test it.