Instruction
1
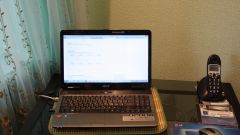
First of all, at the time of configuration you need to connect the laptop to the router with an ordinary wire. Log in to the control panel of router by opening your browser address http://192.168.0.1and enter the username and password to login (it is usually indicated in the documentation for the router).
2
After that, turn on the DHCP service and click on manage wireless connections such as Wi-Fi. Activate the service by selecting the checkbox. Create a new network, assigning it a network name (SSID) and setting the password length from 8 to 13 characters (it is also called a network key).
3
You can also not set a password, but then your network will be accessible to all, which is extremely unsafe. To strengthen the protection of the created network from prying enable encryption for WindowsXP WPA suit, and for Windows Vista and Seven and Linux preferably WPA2.
4
It is recommended to activate the option "hidden network" - the network will not be visible in the search. Make a note of the name that you created network and its key. Disconnect the wire connecting the router and laptop.
5
Now you can connect your laptop to the router using Wi-Fi. Turn on the Wi-Fi module in the laptop the regular way. Wait until the system is ready (usually within 1-2 minutes). Then go to manage network connections and use the wizard to connect to a wireless network. If you have not enabled the option "hidden network", then just select it among the found master. If the option was used, enter the network name manually. Specify on request of the master password (key) network. After that, open the properties for your connection and in the properties of the Internet Protocol (TCP/IP)" choose the option "Obtain IP automatically".Check the connection to the Internet.